Difference between revisions of "Using the Point of Sale"
| Line 56: | Line 56: | ||
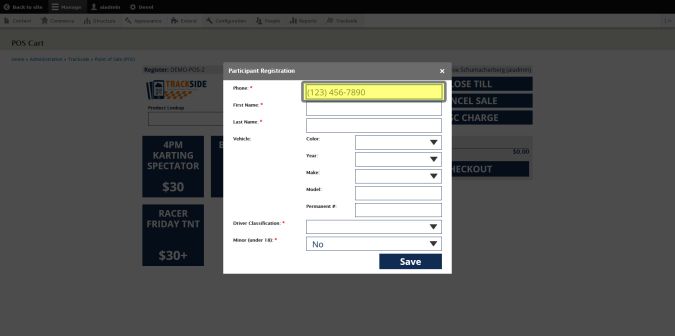
Enter the Participant's phone number, then hit Tab on your keyboard, or click in the First Name text box. If they have an account, the rest of their saved information will populate in the form and you may simply confirm the information is correct. If they do not have an account, you will need to input the rest of their information into the form. | Enter the Participant's phone number, then hit Tab on your keyboard, or click in the First Name text box. If they have an account, the rest of their saved information will populate in the form and you may simply confirm the information is correct. If they do not have an account, you will need to input the rest of their information into the form. | ||
[[File:POSParticipantPhone.jpg|frameless|center|675px|Enter Participant phone number]] | [[File:POSParticipantPhone.jpg|frameless|center|675px|Enter Participant phone number]] | ||
===Step 9=== | |||
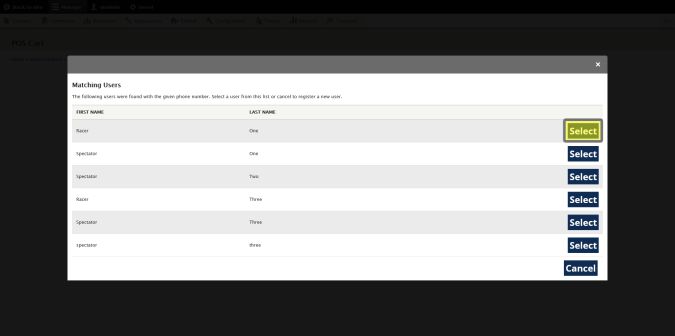
If the phone number is associated with an existing account, choose the correct name from the list by clicking Select. | |||
[[File:POSParticipantSelectUser.jpg|frameless|center|675px|Click Select]] | |||
===Step 10=== | |||
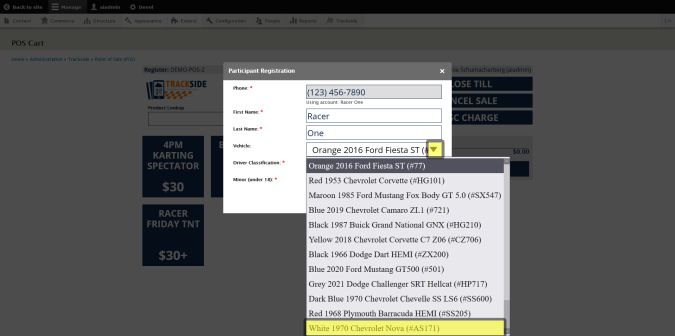
Enter or verify the Participant's first and last name, then we will either enter their vehicle information or select one from their garage using the drop down menu if they don't always drive the same car. | |||
[[File:POSParticipantSelectVehicle.jpg|frameless|center|675px|Select Vehicle]] | |||
</br> | </br> | ||
Revision as of 02:57, 1 August 2022
This article is intended to get you through basic operation of the Trackside Point of Sale. This can be done from the Trackside Point of Sale terminal or from a web browser. If you're here, you're ready to start generating income on site with Trackside! Congratulations!
Prerequisite steps:
- You must have products to sell which are created with Event Setup Assistant and/or Product Setup Assistant. If you have events listed on your Default Trackside Home Page and haven't deleted any of your products, you will have at least a Participant Registration Product to sell.
- Create Register Groups
- Add Registers & Assign Them to Register Groups
Optional steps:
You must be logged in as a user with Point of Sale User permissions to perform these actions. See User Permissions if you need assistance granting access to additional users.
Step 1
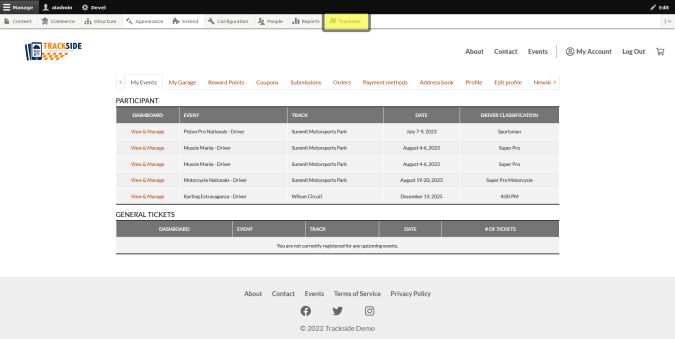
After signing in, Hover over Trackside. Alternatively you can click on this and it will take you to a separate page with the link for the next step on it. Click that link and you will get to Step 3 all the same.
Step 2
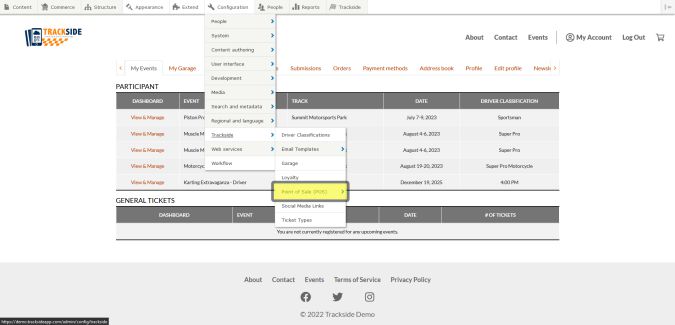
Click on Point of Sale (POS).
Step 3
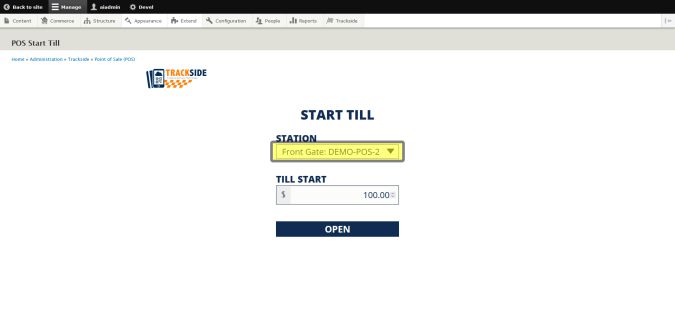
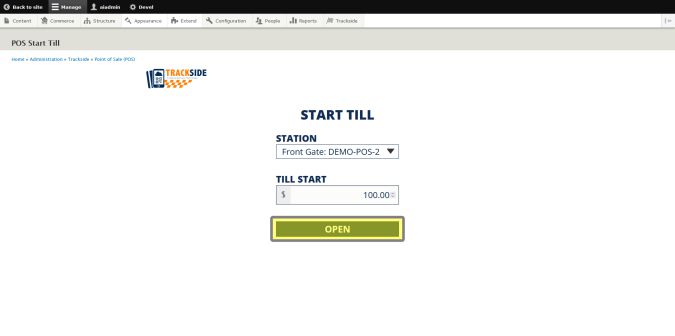
The next step is to start the till to open your register. If you don't have the following screens appear for you when you begin your Point of Sale session, it's possible the previous user had not closed the till. You may continue to operate from their till and jump to Step 6 or if you would like to verify your cash drawer amounts, you may jump to step _ to close your till, then return here to start your till and begin a new session. We will start by selecting the Register Group and register you intend to sell products from in the drop down list. See Create Register Groups and Add Registers & Assign Them to Register Groups if this has not yet been completed.
Step 4
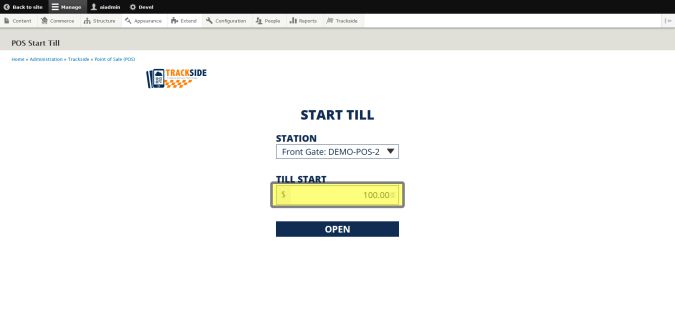
Enter your Till Start amount.
Step 5
Click on Open.
Step 6
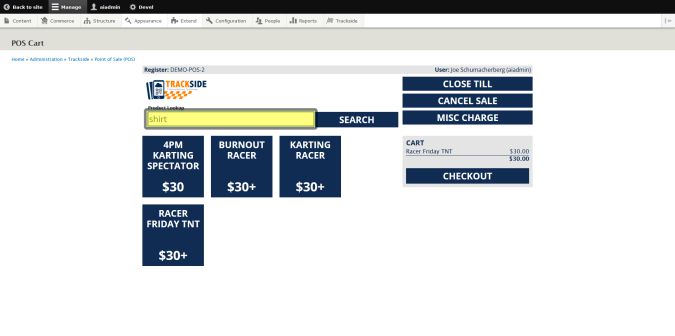
You are now ready to begin selling products from your Point of Sale. There are 4 ways to accomplish adding items to a ticket:
- Scan a barcode - below
- Click a button - Step 7
- Product lookup - Step _
- Misc charge - This will be covered in Miscellaneous Charges and Discounts
Option 1: Scan a barcode
You must have a scanner such as the Trackside QR Scanner connected. (See Connect a Scanner Via Bluetooth , Connect a Scanner Via USB Dongle , or Connect a Scanner Via Wired USB . Click in the Product Lookup text box, ensure it is clear, then you may scan.
Step 7
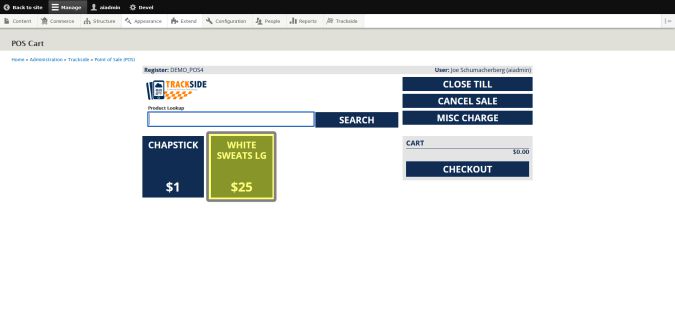
Option 2: Click on buttons to add items to Cart.
Step 8
If you are selling a Participant Registration from the Point of Sale, you will have to fill out their Participant Registration form that they would otherwise fill out online for pre-registrations.
Enter the Participant's phone number, then hit Tab on your keyboard, or click in the First Name text box. If they have an account, the rest of their saved information will populate in the form and you may simply confirm the information is correct. If they do not have an account, you will need to input the rest of their information into the form.
Step 9
If the phone number is associated with an existing account, choose the correct name from the list by clicking Select.
Step 10
Enter or verify the Participant's first and last name, then we will either enter their vehicle information or select one from their garage using the drop down menu if they don't always drive the same car.
